Edit and update your questionnaires on the front-end for quick and easy access
Please watch the following video for an overview of how to edit your questionnaires, or read the detailed breakdown underneath:
Editing and updating your custom questionnaires on the Phinity platform is an integral part of your assessment lifecycle in the long term. This functionality is available via the Assessment Authoring screens under Control Panel.
On the Welcome page of any Phinity Solution, navigate to the Control Panel as shown in the below screenshot: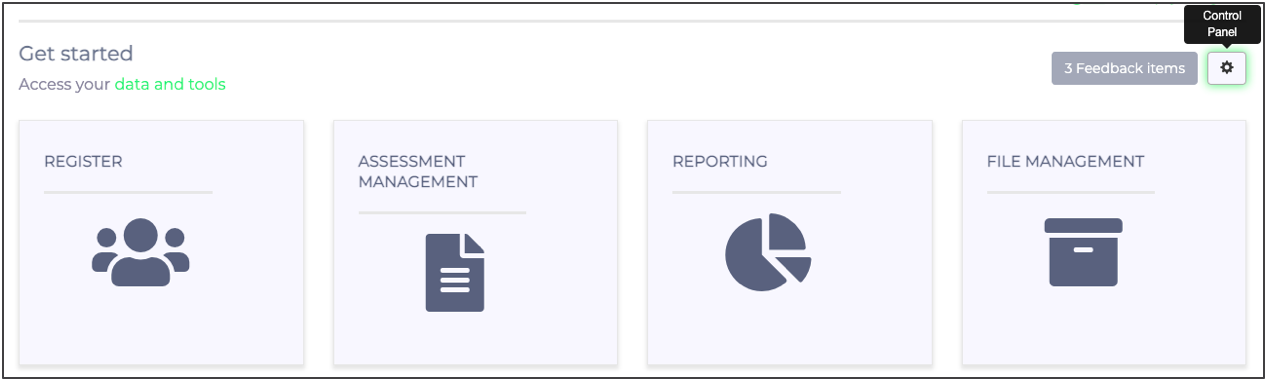
In Control Panel, you should navigate to your Assessments by clicking on 'Assessment Authoring' as shown in the screenshot below: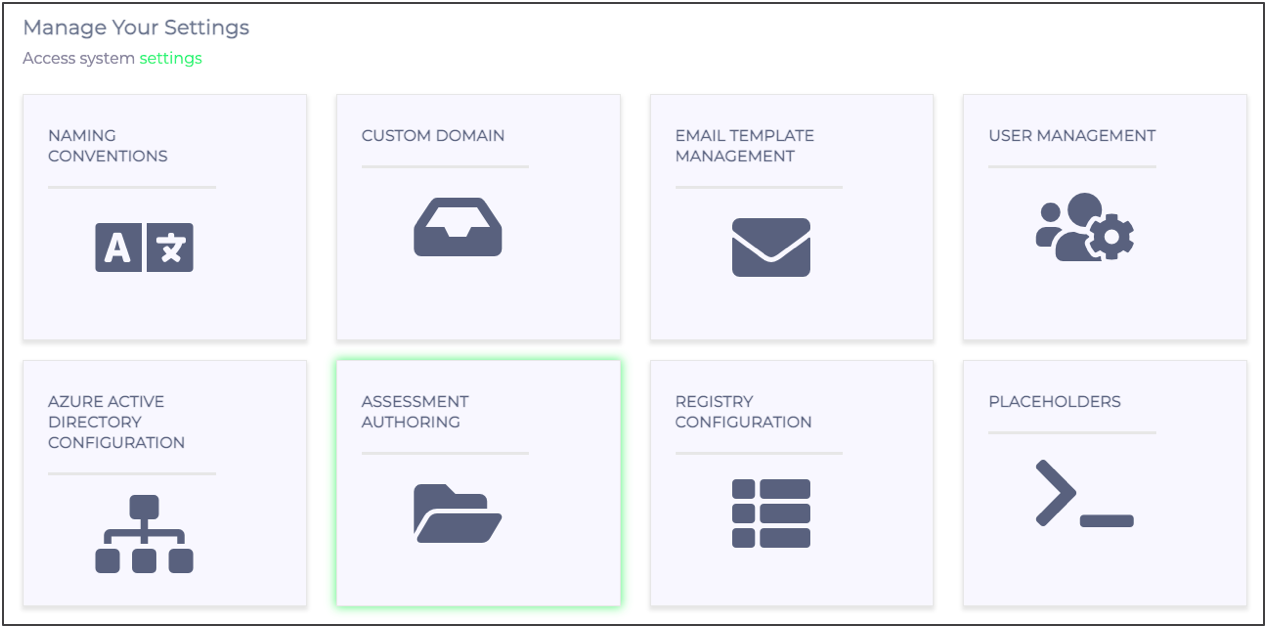
To edit a questionnaire, click on the relevant Assessment Type and click on 'Manage Questionnaires'. Below is a screenshot of this step: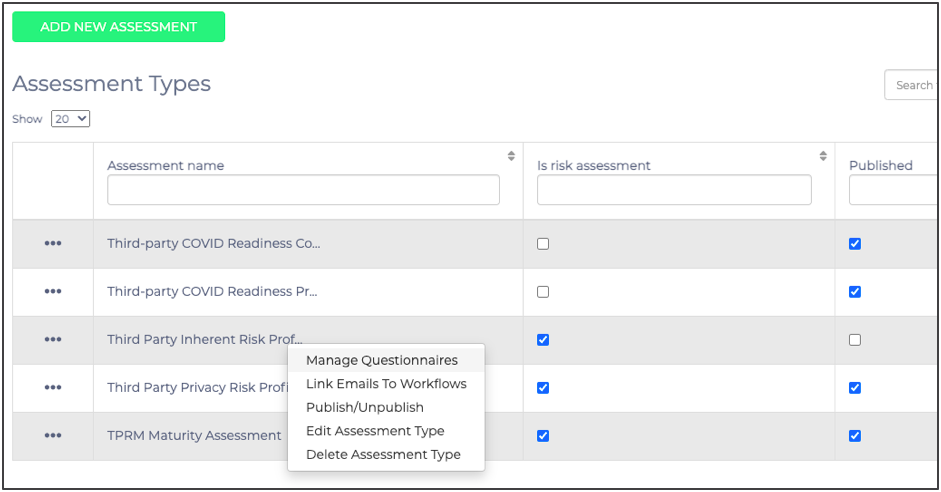
The following screen will appear with your published questionnaire, where you should click 'Edit' as highlighted in the following screenshot: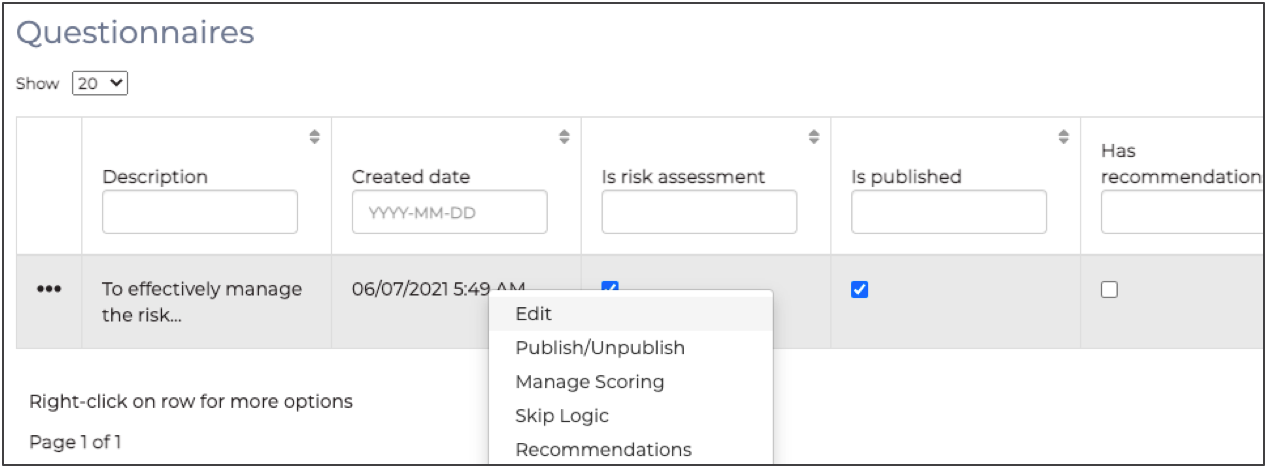
After clicking 'Edit', you will see the Questionnaire Editor as per the below screenshot: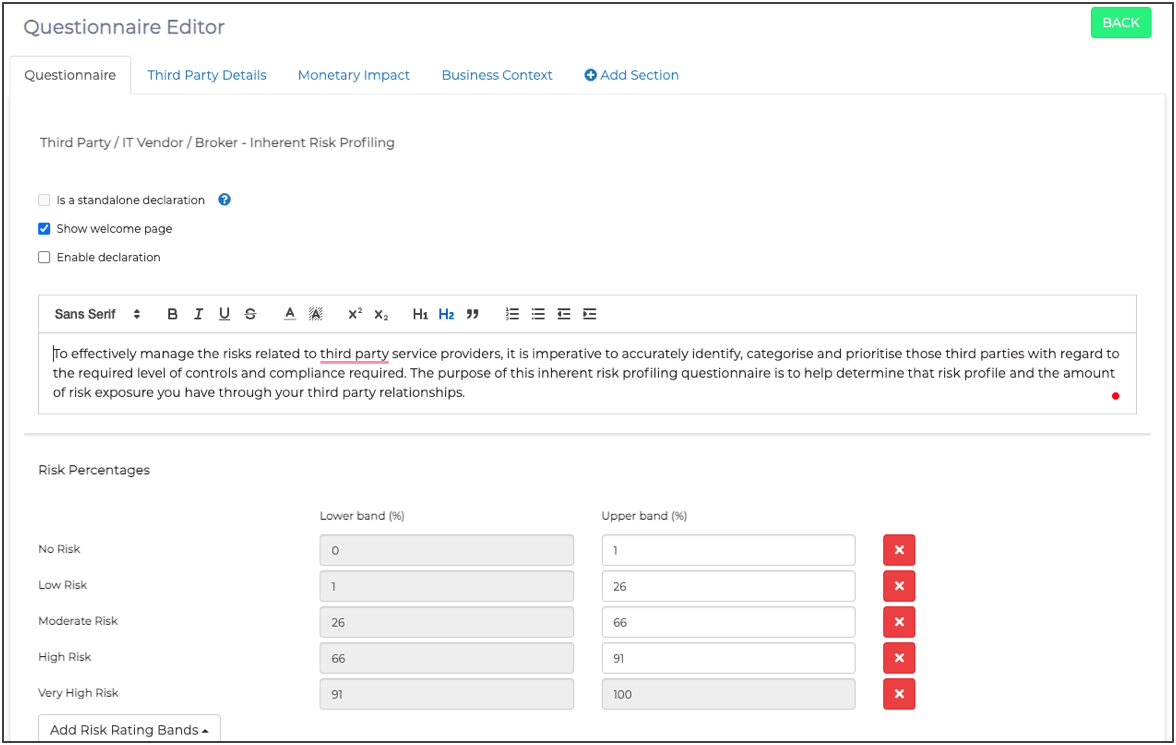
On the first screen of the Questionnaire Editor, you can add and modify your risk rating bands, edit the welcome message to the questionnaire, as well as include declarations. The tabs at the top show you the different questionnaire sections that you can navigate through as required.
Below is a screenshot of the question and section editing: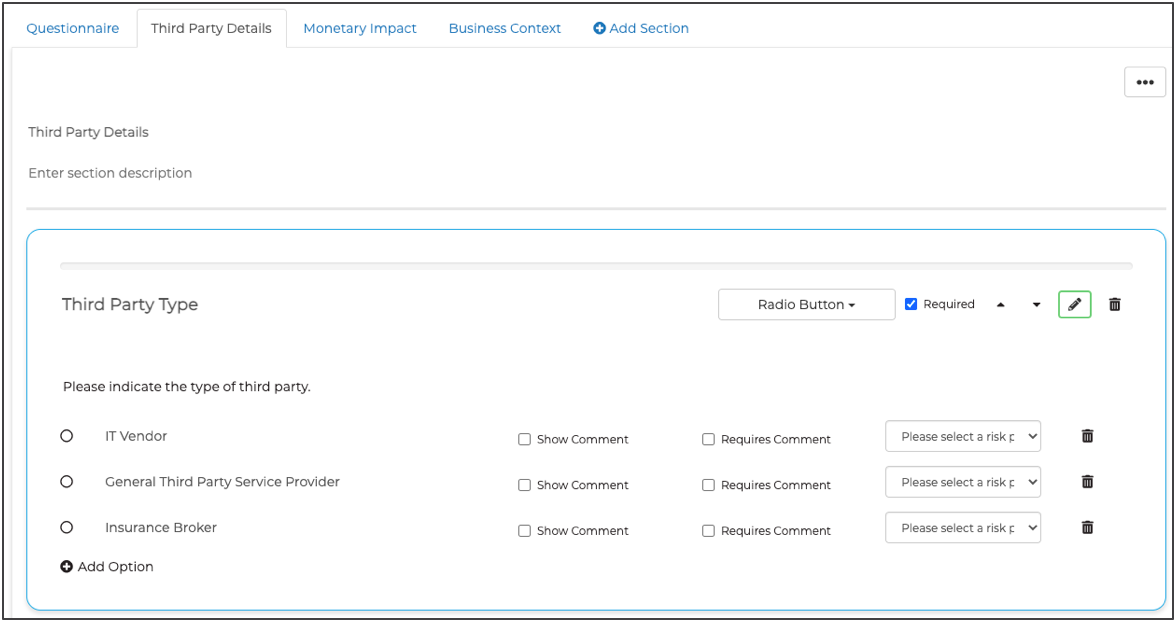
In this view, you can add, edit or delete questions and answer options. You are also able to edit question types from this view and also indicate mandatory comment fields. The pencil button highlighted in the above screenshot is also where you can adjust the compliance ratings/bands for RAG reporting, add placeholder values and question help to assist end-users as per the below screenshot: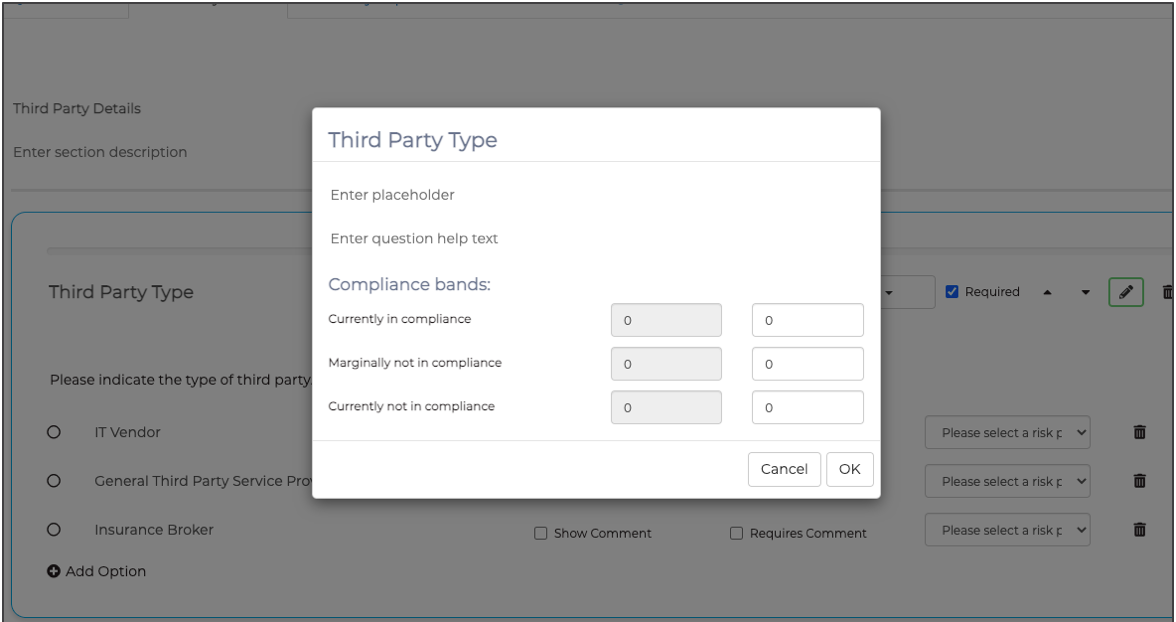
Below is a screenshot of the available question types: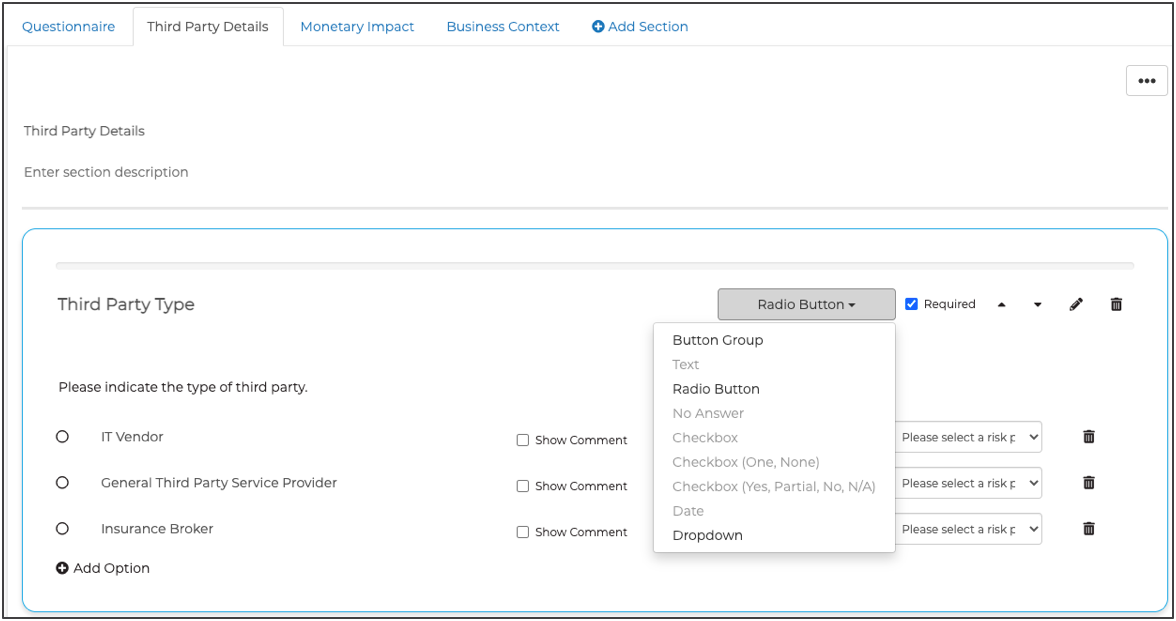
Once you are happy with the changes to your questionnaire, make sure that you click the 'Save' button at the bottom to save the updates that you have made, as per the below screenshot: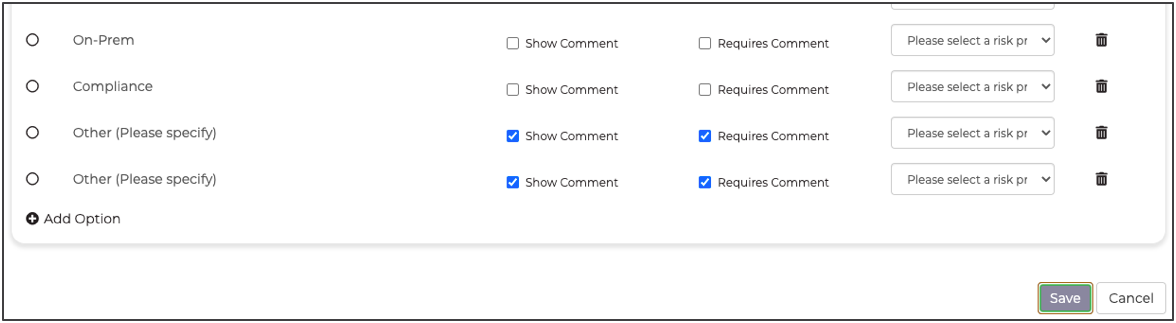
After clicking 'Save', you will see the 'Manage Scoring' screen as per the below screenshot: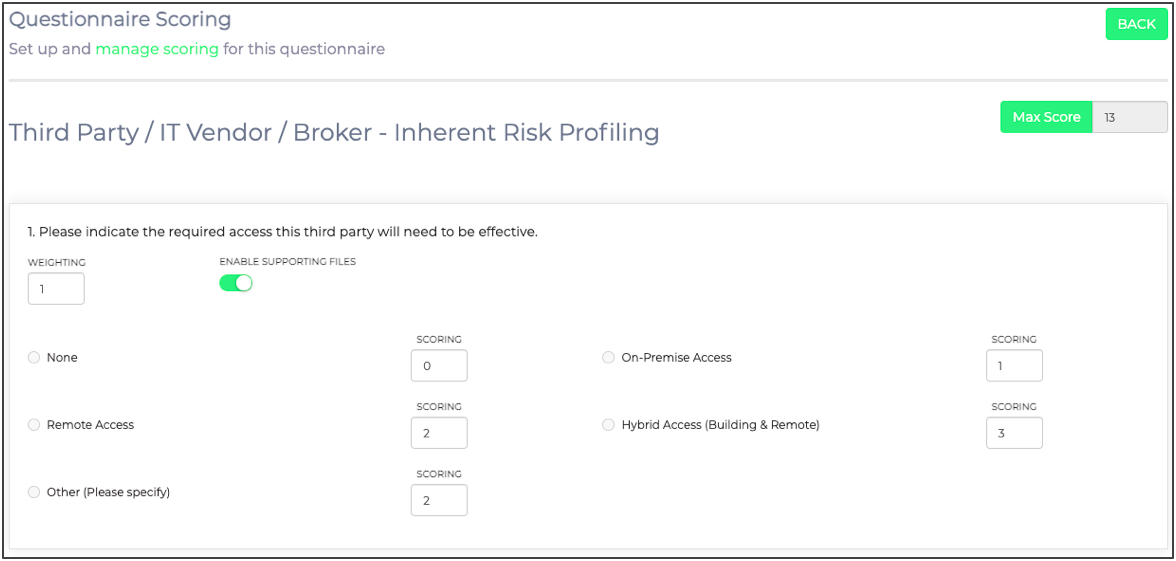
With scoring management, you can change the risk weighting for specific questions in the assessment and enable the upload of supporting files at a question level, wherever evidence is required.
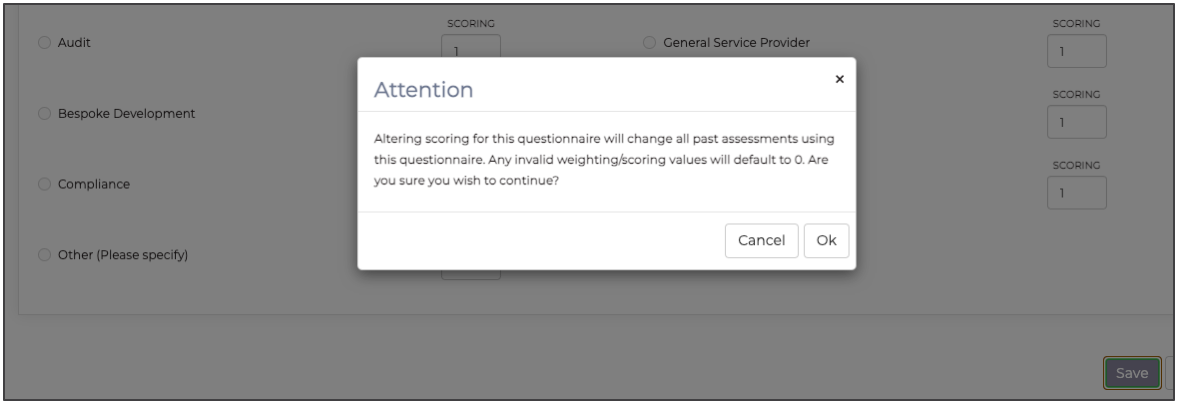
Once you finish editing the scoring, you should click 'Save' again at the bottom of the page.
You will get the following notification to confirm the changes: