Before setting up the Azure Active Directory, please reach out to our Support line support@phinityrisk.com for guidance and assistance throughout this process.
When configured, Azure Active Directory (Azure AD) provides single sign-on and multi-factor authentication to access the Phinity Platform.
Configure Azure Active Directory First
On the home page of Microsoft Azure, search for the App Registration section, as shown in the following screenshot:

Click on App Registration.
Add a new app with the ‘New registration’ button at the top left, as seen below:

Once you have clicked on the new app registration button, the following page will display:

Enter the details below accordingly.
- Name: can be whatever the organization decides.
- Supported account types: This must be the top option for Single tenants only.
- Redirect URL: This needs to point to our live website with your specified domain name.
- Example Production: https://customername.phinityrisk.com
- And UAT: https://customername.phinityriskuat.com.
NOTE: You will set up UAT as a new app.
Once you have entered all the details, you can click on the “Register” button and navigate to the next page. After registering the app, the following page will display:
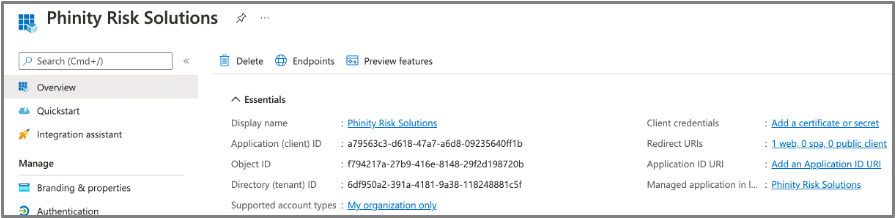
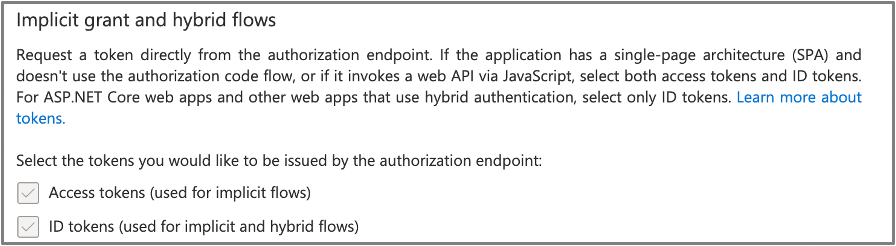
Proceed to click on the “My organization only” link next to "Supported account types" in the top section. A new page will open.
On the new page, ensure that the checkboxes “Access tokens” and “ID tokens” are selected.
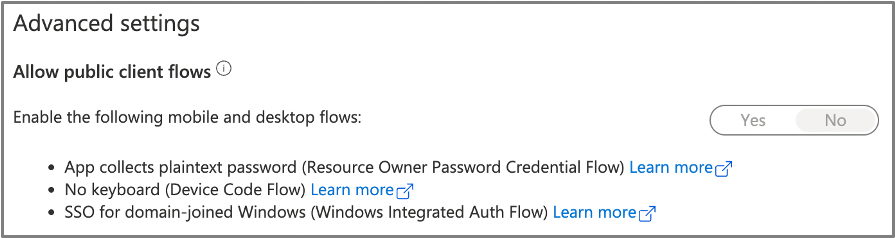
Ensure that you set the default client type to ‘No’ at the bottom of the same page.
Token Configuration is the next step, and you can find this option on the left side of the screen as per the below screenshot:
Once you have navigated to the ‘Token configuration’ page, you have to add an optional claim using the “Add optional claim” button, as seen below:

After you clicked the “Add optional claim” button, the following screen will pop up:

NOTE: It is essential to select “ID” under the Token types listed. Following this selection, more information will become available on the screen. Make sure to select “email” and click “Add”.
You have now added the application register. The next step is to gather all the information required by our system.
The information required is the following:
- Your chosen subdomain. Example. “customername/phinityrisk”.
- Your tenant domain.
- Your application(client) ID.
- Your directory(tenant) ID.
Below are instructions on how to gather all this information.
You can find your tenant domain by searching Azure Active Directory, as seen in the screenshot below:

Once you click on the Azure Active Directory via the button, navigate to “Custom domain names” on the left side of the screen.

When you click on it, the following page will appear:

Your tenant domain will be “yourdomain.onmicrosoft.com”. Make sure to copy the domain ending with “.onmicrosoft.com” to provide to Phinity.
You can find your application(client) ID and directory(tenant) ID on the application page.
If you are having trouble finding your app registered, you can use the search bar in Azure Active Directory.

After you have collected all of the information, you need to contact support@phinityrisk.com to complete the final step and then Azure Active Directory sign-in will be available.